Rice cakes
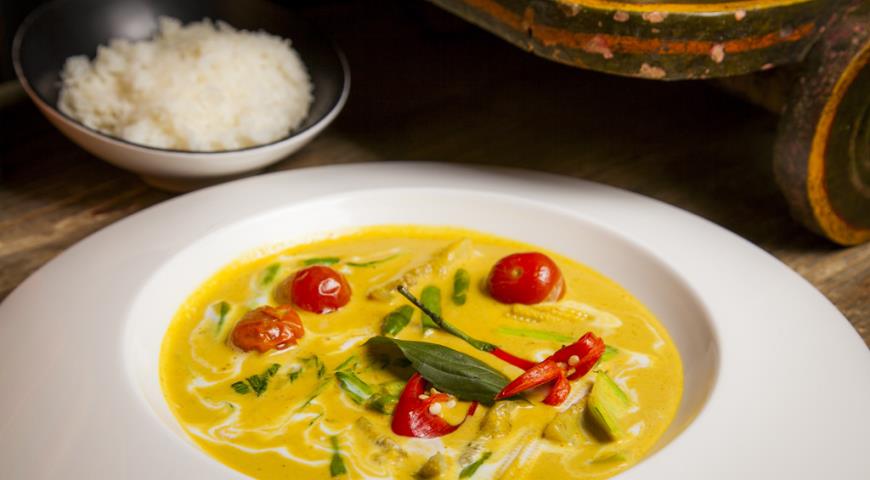
 Delicious rice cakes will appeal to lovers of Asian cuisine. They are great as a side dish for soup instead of bread and are ideal for those who cannot eat bread due to allergies to gluten or for other reasons. It is convenient to cook several servings at once, put in a freezer and get them one by lunch for the next days.Rice cakes
INGREDIENTS
rice 300 ml
rice vinegar 1 tbsp
coconut oil 2 tbsp
salt
pepper
curry, paprika or other seasoning
breadcrumbs
STEP-BY-STEP COOKING RECIPE
Step 1
First, we need to steam the rice to make sticky rice (sticky rice as it is called in Thailand). Any round-grain rice is best suited for this, for example, I usually use Krasnodar. Long-grain and steamed rice is not suitable – in this case, the rice will not stick together and will be friable! Rice should not be washed, otherwise it will lose the starch that we need to give the sticky properties of the rice.
Step 2
Mix rice with water in a ratio of 1 to 2. (I took 300 ml. of rice for 600 ml. of water) We wait for the boil, cover the lid, and boil the rice exactly 5 minutes from the start of the boil, stirring occasionally. Our goal is to make rice slightly absorb moisture and soften. (in Thailand, rice is soaked for 12 hours in this water, but it’s easier to boil it for 5 minutes and it will be in good condition for subsequent steaming)
Step 3
Drain the water after 5 minutes of boiling. At this point, the rice should already look like porridge and not be crumbly.
Step 4
Now we prepare a container for cooking rice for a couple in a slow cooker. Since it has round holes in which rice will fall through, I cut a circle of sieves and put it in this container. (you can use it repeatedly)
Step 5
We put rice in this container. We put the program “Steam”, “Vegetables” for 40 minutes. In different multicookers, the name of the program and the cooking time can be different. The longer the rice is cooked, the more sticky it will be, so see for yourself. You can 30 minutes, but better 40. Add a couple of a pinch of salt, close the lid and turn on steam cooking. Below, of course, rice is flooded with water, which will boil and process rice with this hot steam. This is the essence of steaming products. After 20 minutes, you need to turn the rice and salt again.
Step 6
When the rice is ready, take it out of the slow cooker, let it cool slightly and lightly pour rice vinegar on it. It gives a special taste to rice. Rice can already be used in this form as the basis for meat or fish dishes. Steamed rice is tastier and healthier than regular rice, and you will definitely like it if you have not tried it!
Step 7
But we go further and will make even more delicious rice cakes from this rice, in order to use them as a side dish for soup instead of bread. Take parchment paper. (sold at any store as baking paper) and some round tins (they can also be bought at a grocery store). We measure circles in those places where rice will be located.
Step 8
Pour rice into round molds. This is best done 20 minutes after putting the rice out of the slow cooker to allow the rice to cool and it becomes even more sticky.
Step 9
Now we lubricate the circles where the rice will be placed with coconut oil (I use coconut oil, as it is safer to fry on it, but you can use regular oil) – 1 tablespoon of oil for 2 servings. I will have 4 servings, so I distributed 2 tablespoons of oil to all the mugs. Then sprinkle with salt, black or red pepper, breadcrumbs (optional), paprika, curry or other seasoning.
Step 10
Spoon this mixture lightly with a spoon.
Step 11
We put the molds with rice in the place that we greased with oil and seasonings.
Step 12
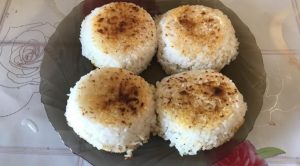
We remove the molds. As you can see in the photo, the rice did not crumble, which means that the necessary stickiness has been achieved. If at this moment your rice crumbles, then refuse to fry, and use rice in its usual form, since it will not work to fry rice cakes from crumbly rice.
Step 13
Cover on top with the other side treated with oil and seasonings.
Step 14
Now we turn to frying in a pan. The pan must be dry, you do not need to add oil to it! Turn on the empty pan for maximum power, wait 2 minutes when it warms up. We put 4 rice cakes in a pan together with parchment paper covering the rice from 2 sides.
Step 15
We reduce power to slightly below maximum. My maximum is “9”, and I fry the rice at “7”. After 5 minutes, we turn this entire bundle carefully to the other side, holding the paper and rice with your hands (do not burn yourself, just grab the paper with your hands.